Editing with Audacity – Quick Tips I: The Tools Menu
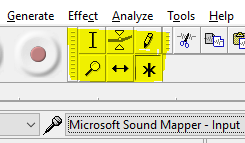
If you have used Audacity for recording and editing your audio, you will be familiar with the Tools menu. This little box has six essential editing tools – Selection, Envelope, Draw, Zoom, Time shift and Multi.
If you want to set the cursor or highlight a section of audio, you need to first click on Selection Tool. If you want to move an audio file, you must first click on the Time Shift Tool. When you are doing a lot of editing, this can get tedious very quickly. Even using the allocated keyboard short cuts (F1 – F6) still wears thin after a while.
I do a lot of audio editing, and so I was delighted to discover the possibilities of the sixth tool – the Multi Tool (F6). When the Multi Tool is selected, here’s what it will allow me to do:
- To place the cursor, simply left click on the edit screen.
- To highlight a section of an audio recording, left click and drag.
- To adjust the volume of an audio recording up or down, left click on the blue line to set edit envelopes.
- To adjust the volume of a whole audio file, click on the join between the light and dark grey sections, and drag up or down.
- To zoom in at a particular place, hold the mouse in that place, hold down the control key, and use your mouse wheel (it will work to zoom in and zoom out)
- To reposition an audio file, hold the control key, click on the audio file and drag into position.
OK, it’s not as cool as Adobe Audition’s left click to highlight / right click to drag. However, let me say, I got used to it pretty quickly…and remember the cost savings!
So, go forth and edit with renewed ease!
Happy Broadcasting
: Blogs